Issue with dark top glass area in vista skin

I've recently been using a skin titled BetterVistaAeroX. I wanted to remove the darkening effect applied to the window frames when entering a maximized state. I was only partially successful. In my edit, the window frames now keep their  translucent appearance, but the explorer area, pictured below and outlined in red, does not. The "maximized caption" setting in Skin Studio only seems to effect window frames and not the "top glass area" section of the explorer, but as someone that is extremely inexperienced using Skin Studio, I can't determine what is controlling the darkening effect for the explorer in the maximized state. It looks like it might have something to do with the .tga image itself having a baked-in black strip for darkening the window when maximized (?). Any help on this front would be greatly appreciated. Here is the unedited BetterVistaAeroX skin.


395 views 9 replies
Reply #1 Top

Sorry to hear you are having issues. Need to know more information on your system.

  1. You on Windows 10 or 11? Also need its full version and OS Build number. Use Winver.exe to get these information.
  2. Windowblinds full version number.
  3. I can't find BetterVistaAeroX in Wincustomize.com, please post a link to it.
  4. Do you have any application running that change how your Explorer work something like OldNewExplorer or WindHawk etc.

Thank you,

Basj,
Stardock Community Assistant.


Reply #2 Top

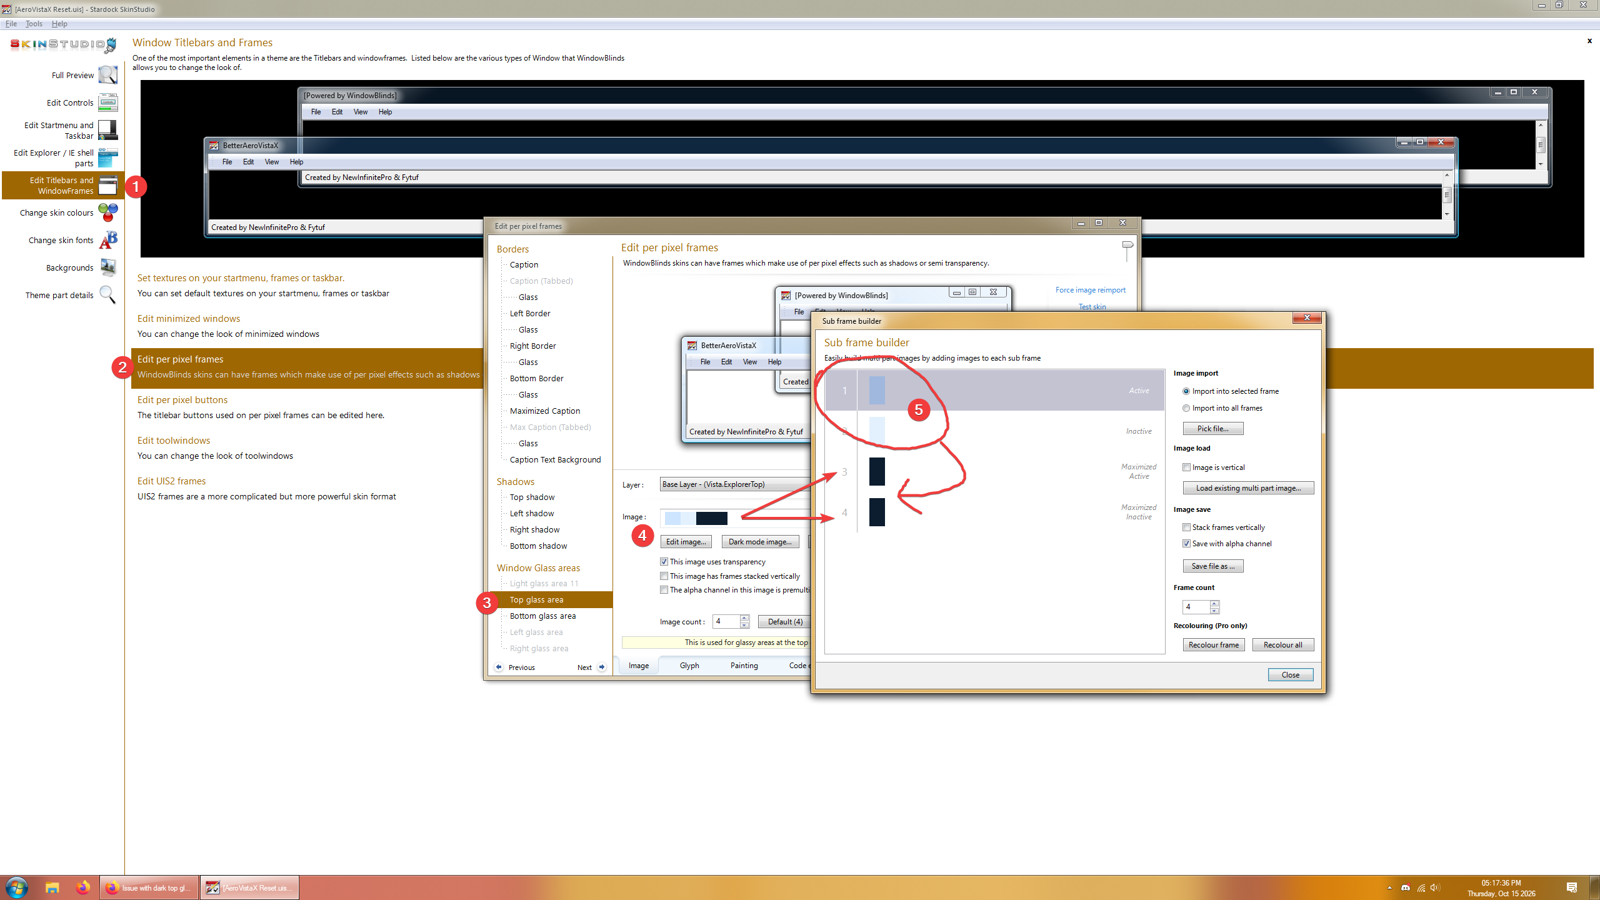
In skin studio, go to the following spot.

1. Edit Titlebars and Window Frames

2. Edit per pixel frames

3. Top glass area

4. Edit image

5 Copy the state 1/2 into state 3 and 4. Then save and reimport the image.


Reply #3 Top

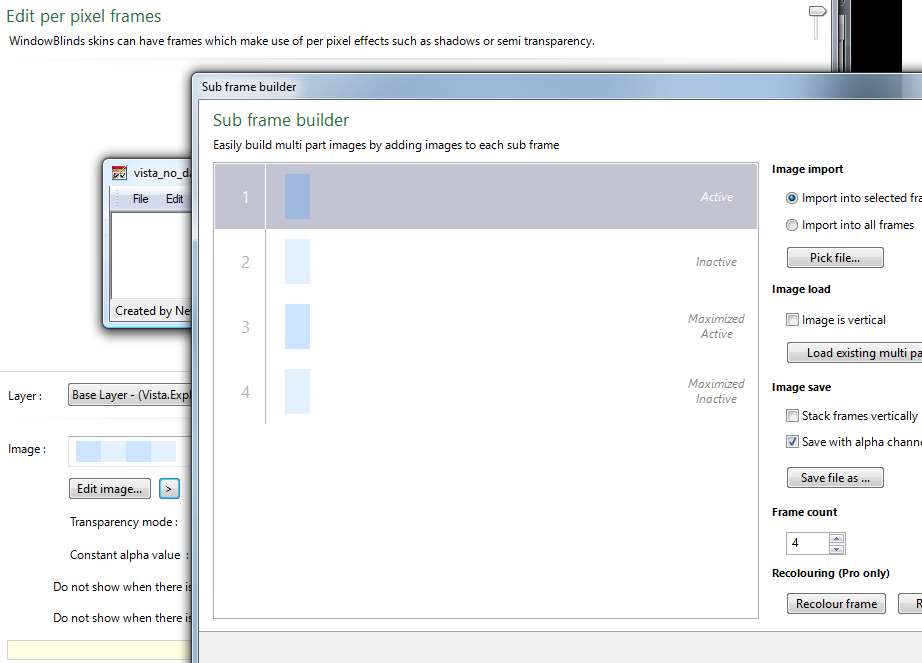
Thank you so much for the fast and helpful reply! I didn't even find this sub-menu when initially poking around. I'm still not getting the correct result on my end though, I'm likely doing something wrong. Here is what I've got:

These are the edits I made...

and this is how the explorer looks when the change has been applied. Any idea what the issue might be?

Reply #4 Top

What format is that image in when you imported it? It looks like it did not import correctly or one of your explorer mods is rendering it improper.


Quoting SkipJack1234, reply 4148624

Thank you so much for the fast and helpful reply! I didn't even find this sub-menu when initially poking around. I'm still not getting the correct result on my end though, I'm likely doing something wrong. Here is what I've got:

These are the edits I made...

and this is how the explorer looks when the change has been applied. Any idea what the issue might be?

End of SkipJack1234's quote


Reply #5 Top

It looks like it may be being set to just paint the image in the centre rather than stretched to fill the area?

Reply #6 Top

The image was in .tga, the same as the file type I replaced. I made the edits in GIMP, it could have something to do with the way I did that and exported it. When I first exported, I had an issue with compression, so I turned it off. That made the proper colors populate the sub frame builder view, but the change I wanted to see didn't take effect in the explorer view.

Reply #7 Top

Thank you for helping out as well. If this is the case, how I can I determine that? I should probably watch some tutorial videos on how to properly use SkinStudio lol. 

Reply #8 Top

Gimp may not be saving the images in the correct tga format. Maybe save it as a png and reimport to see if that fixes it.

Reply #9 Top

You were right, importing as a PNG did make a difference. While the glass texture now mostly works, I'm still getting that blank spot in the middle. I think I just need to keep tweaking the settings until it goes away. Thank you again for the help!